Showing posts with label Desserts. Show all posts

Monday, June 20, 2011

Strawberry-lime Shortcake with Coconut Cream


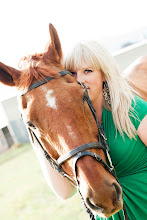
This is my baby sister Erica with my new niece. This is what I made this weekend for my baby sister Erica's birthday. It was delicious. That is all.

Monday, January 10, 2011

Lemonade Cookies


My mom used to make these all the time when I was a kid and I found the recipe! So my gift to you is a taste of summer in these dreary winter days.

2 sticks (1 cup) butter
1 c sugar
1/2 tsp salt
2 eggs, beaten
1 tsp baking soda
3-4 c flour
1/2 tsp grated lemon zest
1 can (6 oz) frozen lemonade, thawed

Preheat oven to 375 degrees. Cream butter and sugar until fluffy and thoroughly combined. Beat in eggs and lemon zest. Mix flour, salt, and soda. Add to creamed mixture with half of the lemonade concentrate. Drop mixture by teaspoon onto ungreased cookie sheet. Bake at 375 degrees for 8 to 10 minutes or until light brown around edges. Brush hot cookies with remaining lemonade concentrate then sprinkle with granulated sugar.


Thursday, November 4, 2010

Pumpkin Chocolate Chip Cookies

Just for fun, here is the easiest recipe for pumpkin chocolate chip cookies you have ever seen. Be careful or you might eat them all day long.

Ingredients:
1 box spice cake mix
Chocolate Chips
15 oz. can of pumpkin

No really that's all the ingredients.

Mix the pumpkin and cake mix together till combined. You don't need to add anything else. No eggs, no oil, no nothing. Just the pumpkin and the spice cake mix. Then mix in the chocolate chips.

Bake at 350 until cookies are dry like a cake. This could take 15 minutes, maybe longer, depending on your oven.

You are welcome.

Wednesday, October 27, 2010

Old-fashioned Apple Cake


Not only does this cake turn out super pretty, it is a lot of fun to make. The entire thing is actually made in a skillet. You cook it up, then flip it over. I don't know about you, but if the directions call to flip something over, I pretty much have to make it. I think it's because I always wanted to learn how to do a backflip on my own. That will never happen, so I'll stick to this I think. On to the recipe!

Ingredients:

Apples--

5 Granny Smith Apples peeled, cored, and cut into wedges

1 1/2 sticks butter

1/2 cup sugar

1/4 cup brown sugar

Cake:

1 stick butter

2/3 cup sugar

1 1/2 tsp. vanilla

2 eggs

1/2 cup sour cream

1 1/2 cups flour

1 1/2 tsp. baking powder

1/2 tsp. plus a couple shakes cinnamon

1 more Granny Smith Apple

Preheat oven to 375.

In a medium oven proof skillet, melt stick and a half of butter for the apples. Swirl around both sugars in the melted butter until they are a bit dissolved. Place the apple wedges in the pan with the fat side down and the skinny side up. Cook all of this over low to low/medium heat so the butter and sugar simmers its magic all over the apples. While it's simmering, bake the cake.

Whisk the flour, baking powder, salt, and cinnamon together in a bowl. In a separate bowl, beat the 1 stick of (softened) butter and 2/3 cup sugar with an electric mixer until light and fluffy. Mix in the vanilla and eggs and then add the sour cream and milk. Add the flour mixture and stir until just combined. Gently fold in the remaining Granny Smith apple (which has since been peeled, cored, and chopped into cubes).

Remove the skillet from the heat and spoon the cake mixture gently over the top of the now caramelized apples. Spread it evenly and try not to leave any holes in the top. Set skillet on a tinfoil covered baking sheet to catch any drips. Put the skillet and the baking sheet into the oven and bake for 20 to 25 minutes, or until the cake is nice and brown on top.

When finished, remove from the oven and let sit for five minutes. Then FLIP onto a pretty plate! Then do a real backflip yourself. If you can...I dare you...

Tuesday, October 19, 2010

Chocolate "Devil" Cake

So I rode a mechanical bull last night. Not a big deal. I'm pretty much a rodeo star. To commemorate the occasion I decided to post the recipe for Texas Sheet Cake, or as my mom calls it the "devil cake" because it's the devil and she literally can't stop eating it. It's also the devil cake because of the amount of sugar and butter in it, but I hear the calories don't count on Wednesdays and on the weekend.

Ingredients:

Cake:
2 cups flour
2 cups sugar
1/4 tsp. salt
5-6 Tbs. powdered cocoa (depending on how chocolatey you want it)
2 sticks butter
1 cup boiling water
1/2 cup buttermilk
2 eggs
1 tsp. baking soda
1 tsp. vanilla

Frosting: 3/4 cup finely chopped pecans
1 3/4 stick butter
5-6 Tbs cocoa
6 Tbs. milk
1 tsp. vanilla
1 pound (less 1/2 cup) of sugar.

Cake:
Preheat the oven to 350 then combine flour, sugar, and salt.

Melt the butter at medium high heat in a saucepan on the stove. Add the cocoa and stir it together. Add the boiling water and boil for about 30 seconds. Pour this chocolate mixture over the flour mixture and slightly stir to cool.

In another bowl, pour in the buttermilk, eggs, baking, soda, and vanilla. Mix it all together for a minute with a whisk then pour into the flour/chocolate mixture and stir to combine. Pour the batter into a sheet cake (jelly roll) pan and bake at 350 for 20 minutes.

Frosting: Chop the pecans finely. Melt the butter in a saucepan on the stove over medium-high heat. Add the cocoa (just like in the cake making step), stir, and turn off the heat. Add the rest of the frosting ingredients and stir it all together. Lastly, stir in the pecans and pour over the warm cooked cake.

Let it cool for just a few minutes, then dig in. This cake is best eaten warm, and just try to stop eating it, I dare you.

Many thanks to the Pioneer Woman for the recipe.

Wednesday, February 3, 2010

Amazing Sugar Cookies

Sorry it's been so long! Christmas was crazy and the New Year has been just as busy. I'm back though, with two new posts tonight.

First, dessert. These are some pretty great sugar cookies. I made them about a month ago so no pic, but trust me, they will crumble in your mouth. No need for frosting because they are super tasty all on their own.

Ingredients:
2 large eggs
1 cup canola oil
2 sticks softened butter
1 cup granulated sugar
1 cup powdered sugar
1 1/4 tsp. vanilla extract
4 cups all-purpose flour
1 tsp. salt
1 tsp. baking soda
1 tsp. cream of tartar

Cream together the eggs, oil, butter both sugars, and vanilla. Add the rest of the ingredients and mix. Add a couple more tablespoons flour if dough feels too wet. Refrigerate an hour.

Take the dough out of the refrigerator and roll into balls to be placed on the cookie sheet. Flatten the dough into round disks (don't totally flatten the dough, just the top). Sprinkle the cookies with extra granulated sugar.

Bake 11 minutes at 350.

Thursday, November 5, 2009

Peach Cobbler


This is by far the best peach cobbler I have ever had. It takes just a little bit of time, but for the most part it's super easy. I promise if you try it you will love it and I will never post anything on this site I haven't tried and just loved. For love of your country, I urge you to make this. Anything I have made from America's Test Kitchen has been amazing.

Fruit Filling: 8 peaches
Peel, halve, core and cut into chunks
1 Tbs cornstarch
1/3 to 2/3 cup sugar
1 tsp fresh lemon juice and 1 tsp vanilla

Stir together in a large bowl.


1 1/2 cups flour
1/4 cup plus 2 tsp sugar
1 1/2 tsp baking powder
1/4 tsp baking soda
1/4 tsp salt
3/4 cup buttermilk chilled
6 Tbs (3/4 stick) butter melted and slightly cooled
1/8 tsp. ground ginger
3 Tbs. crystallized ginger

Preheat the oven to 400 degrees. In a 9-inch deep-dish glass pie plate put the fruit filling, cover it with foil, and set the pie plate on a foil-lined rimmed baking sheet. Line a second rimmed baking sheet with parchment paper.

Whisk the flour, 1/4 cup of the sugar, baking powder, baking soda, salt, and crystallized ginger together in a large bowl. In a medium bowl, stir the chilled buttermilk and melted butter together until the butter forms small clumps. Stir the buttermilk mixture with the flour mixture with a rubber spatula until just incorporated and the dough pulls away from the sides of the bowl.

Using a greased 1/4- cup measure, scoop out and drop 8 mounds of dough onto the parchment lined baking sheet, spaced about 1 1/2 inches apart. Toss the remaining 2 tsp sugar with the ground ginger and sprnkle the ginger sugar over the biscuit tops. Bake the biscuits until puffed and lightly browned on the bottom, about 10 minutes.

Remove the biscuits from the oven and set aside. Place the fruit in the oven and bake until it is hot and has released its juices, 20 to 25.

Remove the fruit from the oven, uncover, and stir gently. Arrange the biscuits over the top, squeezing them slightly as needed to fit into the dish. Bake until the biscuits are golden brown and the fruit is bubbling, about 15 minutes, rotating the dish halfway through baking (unless you have a convected oven, then you don't need to worry about rotating). Let cool for 10 minutes before serving.

Tuesday, September 1, 2009

Boston Cream Cupcakes

If you like Bismarck doughnuts or cream in the middle of everything you will die over these cupcakes. They take a little bit of effort, and they can be hard to assemble, but not to fear! The chocolate topping covers any mistakes you might make on your first try.

Ingredients:
Cream--1 1/2 cups heavy cream
3 large egg yolks
1/3 cup sugar
Pinch salt
4 tsp. cornstarch
2 Tbs butter cut into 2 pieces
1 1/2 tsp. vanilla

Cupcakes--
1 3/4 cup all-purpose flour
1 cup sugar
1 1/2 tsp. baking powder
3/4 tsp. salt
12 Tbs. butter softened
3 large eggs
3/4 cup whole milk
1 1/2 tsps vanilla

Glaze--
8 oz bittersweet chocolate, chopped
2/3 cup heavy cream
1/4 cup light corn syrup
1/2 tsp. vanilla

For the cream: Simmer the cream in a saucepan over medium heat. In another bowl, whisk the egg yolks, sugar, and salt together then whisk in the cornstarch until mixture changes to a pale yellow and thickens.

Whisk the hot cream into the egg mixture to cool a bit, then return the mixture to the pan and cook over medium heat. Whisk constantly until mixture becomes glossy and thick. IMPORTANT: do not let the mixture boil because if you do it will separate later. Take the saucepan off the heat as soon as it looks thick. Off the heat whisk in the butter and vanilla needed for the cream recipe. Transfer the finished cream to a bowl and place plastic wrap directly on the cream (to keep in the moisture) and place in refridgerator until chilled for about 2 hours.

For the cupcakes: Preheat the oven to 350 degrees. Grease and flour a 12-cup muffin tin. It is important that you grease and flour the tin because the cupcakes come out rather light and fluffy, which is good, but easy to fall apart.
Whisk the flour, sugar, baking powder, and salt together in a large bowl. Grab your electric mixer and beat the softened butter into the flour mixture until it resembles little yellow moist crumbs. After, beat in the eggs one at a time until just combined. Beat in the milk and vanilla about 1 to 3 minutes more until the batter is light and fluffy.
Once the batter is finished, use a 1/4 cup measuring cup and pour the batter into the muffin tin. It is important to note you ONLY fill the cups 3/4 of the way full. Put in less than you think you need. If you overfill, it is bad news to try to get the cupcakes out of the muffin tin. The smaller the cupcakes, the easier they are to work with.
Cook the cupcakes in the preheated oven for 18 to 20 minutes or until the tops are firm and springy. Another way to tell cupcakes are done is to insert a toothpick into the center and if it comes out with just a few moist crumbs they are finished. Let the cakes cool in a pan and then transfer to a wire rack to cool the rest of the way.

For the Glaze: Microwave all of the ingredients together, whisking half-way through, for about a minute or until the mixture is smooth. Let the glaze cool for about 20 minutes so it can thicken, but still pour easily.

Assembly: Cut a small cone shaped area out of the top/middle of the cupcake so there is a big hole in the center. Be carful not to cut into the sides or bottom of the cupcake, but remember the more room you have the more cream you can put in later. Cut the top off of the cone shape you cut out of the cupcake so you have a little round disk of cupcake to place on top once you fill the cupcake with cream. Fill each cupcake with the pastry cream in your refridgerator and then place the round cupcake disk on top of the cream. After all the cupcakes are filled, pour or spoon a generous amount of the chocolate topping on top. The chocolate topping hides all of the cuts you made in the top of the cupcakes. Let the mixture drip down the sides of the cupcakes. A little tip is to place parchment paper under the cupcakes so it is easier to clean up.

Phew! And you are done! Like I said, a little complicated, but these cupcakes will change your life and will make you guaranteed the most popular. *Special thanks to America's Test Kitchen for the recipe.